Search Chicken Scratch Blog

Saturday, October 31, 2015

Chicken Run

Recently, the little chicken ladies turned seven months old. Now that they are older and officially comfortable with their surroundings one of their favorite things to do is go exploring. They are always out on the prowl to find new places to scratch, peck for snacks, and take dirt baths. When they first were placed outside they were timid. Always stayed in a group and usually remained in one small portion of the yard. Not anymore! They each have developed their own personalities and do not mind at times breaking off from the group to do their own thing.
  At first, Cory and I were fine with this because they always found their way back to the coop at dusk. We would leave them out for a while when we ran errands so they were free ranging for most of the day which they enjoyed. This was all until I encountered the fox and we realized they were getting into things that they should not be. For example, they loved laying and eating all of the flowers out of the flower pots I had put together. Which I was not very fond of! Haha. We decided it was time for fencing. Our goal was to create an area around the coop that was large enough for the chickens to range in. With that in mind, right now since we are around the house when they are outside we were not building a fence to keep predators out but more to keep the chickens in. Eventually, we will develop our fencing more with bird netting etc. to keep predators out but we wanted to create a basic fencing foundation first.
      Fencing can be quiet expensive if you have to purchase everything for the store, however, it is still an option! Luckily for us, Cory is very creative when it comes to projects like this so we were able to do this at an affordable cost. The fencing itself we found for free. The wire portion we found at our local town transfer station; someone had graciously set it aside! We also incorporated some wooden fencing that was set out for free in the neighborhood. The fence posts, Cory had cut down small trees from the back woods earlier in the year. To create a gate, we will be using a portion of the wooden fence with some hinges, a lock, handles, and a wheel on the bottom to help support some weight and improve moment for opening and closing. This will allow us access to the coop and run as well as an easy way to occasionally let the chickens out to range in the rest of the yard.

This is what the post hole auger looked like
Once all of the materials were gathered the first step was to dig the holes for the posts. We rented a post hole auger and every eight feet around the coop we dug down two feet to create the holes. The area ended up being 24x24 which is plenty of room for the tiny girls. The posts were set in a mixture of cement and dirt. We wanted to make sure they were sturdy enough to hold the fencing and the gate once we put them up. We let the posts set overnight.
  The next day it was time to add the fencing. Across the back area of the coop towards the woods we used a large portion of the wooden fencing because the ground was more level and that is where the chickens tended to "break out" of the coop area. The rest of the way around we use the wire fencing. We did stack two layers of wire fencing behind the coop next to the wooden portion just to make sure they would not try and fly out. It does also provide a barrier for predators even though that was not our main concern at this time. Our woods is the home to many hungry creatures so any means to protect the chickens is always helpful.
   There are three chickens that I like to refer to as the three amigos; Betty, Luna and Dumpling. They are always the three that break out of the coop area to go roam around the rest of the yard. They never seems to want to follow the rules! Haha. No matter how many barriers we tried to create they always managed to find a way out. However, now that we have the official fencing up they have been staying all together which has helped lower our anxiety levels and puts our minds at ease. Knowing they are safer while they are outside is a great benefit to building the fencing!



Sunday, October 11, 2015

Snack Time!!


    Who doesn't love snack time? I sure do! The rule of thumb when giving chickens a snack is to not feed them anything that you would not eat yourself. That means if you have something that has expired it is suggested to not feed that to your hens.  I was doing some research to see what types of snacks that chickens could eat and if there was anything in particular that is not good for them. So far, what I have seen is they can pretty much have anything. I would not advise you go out and get them a snickers bar, but giving them fruits, vegetables and even scrambled eggs would be delicious treats that they would enjoy. I would give the girls scrambled eggs every once in a while when they were babies to make sure they were getting enough protein. Recently, I found that one of their favorite snacks are mealworms. You can buy live mealworms to feed them but that freaked me out so we got the dried ones. They come in a bag that you can purchase at your local pet or tractor supply store. They are obsessed with them. There are several different varieties that you can buy when it comes to mealworms which I found interesting. They are like the potato chips for chickens haha! There are mealworms that are plain, or you can purchase a mix. Mealworms with corn, mealworms with sunflower seeds etc.
   I also use these bag of mealworms to my advantage as well. I taught the girls that as soon as I start shaking the bag they all start running towards it and then I sprinkle a bunch on the ground and it turns into a feeding frenzy. It is hilarious watching them all sprinting over to the sounds of the shaking bag. They come flying around the corner or down the ramp of the coop to get a taste of their favorite treat. When we first fed it to them we would put some in our hands and let them peck at it but that led to them climbing all over each other and to be honest their pecks hurt a little bit. Placing them on the ground is much easier and creates less of a mess.
What's on your beak Peanut?
  Snacks can also be used as boredom busters. I was doing some looking around on my favorite chicken website Backyard Chickens to try and gather some ideas of what to give them in the Winter since I am assuming they will not want to be outside as much due to the cold. ( I could be proven wrong on this since this will be our first winter with the ladies so stay tuned). However, I read that you can get a head of lettuce and tie it inside the coop with a string so it hangs and the chickens will peck at it for hours. It is a nice treat and a way to occupy their time so they do not begin to pick on each other. Another one I would like to try is putting feed or a chicken “snack mix” into a water bottle with holes that they can peck at. Kind of like those treat toys you can purchase for your dog. The ones that they pat around and bite and eventually a treat falls out. I want to do something similar to that since they love to scratch their feet and peck at things. You can mix anything together and put it in there. I was thinking about corn, raisins, maybe dried fruit. I also recently purchased a treat square. It has sunflower seeds and mealworms compacted together so the chickens can peck and scratch at it and break it apart. I have not give it to the girls yet but I am fairly certain they are going to love it!
They all come together for snack time!
  Now I do not give the chickens snacks every day because I do not want their healthy lifestyles to become unhealthy by being over fed. However, every few days they get some mealworms or left over fruit and veggies. We will want to monitor the amount of snacks they get in the winter if they are not getting as much exercise because that could lead to other problems with their legs, overall health etc. Chickens are already known to consume more food and water in the winter as a means to help keep themselves warm without snacks included.  
    Also, when giving them treats make sure you size them down so they are easy for the chickens to swallow and digest. They get so excited trying to eat it they almost swallow the food whole so make sure it is portioned small enough that the do not have any issues. Happy Snacking!
      

Sunday, September 27, 2015

How to Beat the Heat

With Summer officially over and Fall beginning I wanted to share with you about how the chickens were able to beat the heat this season. We did have a pretty hot summer this year and since the girls are not one to jump into the lake or a swimming pool, they needed to find other means in order to stay cool.
 Here is how you can help your girls! Make sure the hens always have access to fresh water and shade.  Even if they are out in the run during the day, if they have an area out of the sun and a place to get a nice drink that will help immensely keeping them comfortable. If it is a really hot day you could even add a few ice cubes to their water to cool it down for them. We had a few days that were in the 90’s and unfortunately we could not stay home from work and let them be outside of the coop. Cory came up with the great idea of putting Gatorade in their water. This gave them extra electrolytes and made their water tasty and refreshing. I did later on purchase a powder that does the same thing from the local tractor supply store that you can mix in their water. I have not had to use it yet since the temperature has cooled down but it will be nice to have on hand for next year.
       Fortunately, we live in a wooded area so the trees help provide natural shade that the girls can lay under. Also the hens always have access to the coop if they want to get out of the sun. You will see that sometimes they will find other alternatives for shade if they do not want to go back into the coop. I have found them all sitting under our cars or laying in the dirt behind some fencing. Finding areas where the ground is cool and where they can relax, some even take a quick dirt bath.
   Believe it or not though, the girls actually enjoy laying in the direct sunlight. It is like they are trying to get a little chicken tan. They lay down on the driveway or in the yard and fluff up their feathers. Usually they are leaning to one side and they just hang out. If they feel themselves starting to get too hot, you will see them fan themselves with one of their wings. Not only will the stay in the sun, but when more than one hen is laying down they are practically on top of each other. I do not think they could get any closer if their tried. You would think they would want some space in such heat. It must be sisterly love! Hehe.
  Lastly, another thing I have done is put the hose on the mist setting and just spray it over them. It was a little surprising to me that they actually seem to like walking or running through it since usually they do not like to get wet.

Saturday, September 19, 2015

Egg Knowledge

Now that we are up to six laying Hens (wahoo!) I wanted to give you guys a little more information about what I have learned so far about laying hens and the eggs in particular.
 Let’s start with the egg boxes. As mentioned in pervious posts, you want to make sure you have one egg box per 3-4 chickens. Cory built three into our coop so the girls have plenty of room to lay. Make sure you keep the bedding in there clean and fresh so when they lay, the eggs remain sanitary. Some other chicken owners suggested using straw in the egg boxes so the hens have something to nestle down into. They like to feel hidden when laying so that could be a good solution instead of having them venture off into the brush of the woods to lay (which one of our girls attempted to do when she first started laying.) We just use the pine shaving that we have in the rest of the coop currently. I just make sure they are changed out more frequently.
  The girls who are laying naturally just took to laying in the egg boxes. They are a little cramped looking and stay nice and dark which is what the chickens prefer. You will find a few random eggs out in the coop sometimes, or they will even lay outside in the lawn if they are having their “play time” which is fine.
  I also noticed, that once several of them are starting to lay, they tend to lay their eggs close to each other in the egg boxes. If you have a broody hen, they are known to roll all the eggs into one spot and sit on them to keep them warm. It’s a motherly instinct. Even though our eggs are not fertilized since we do not own a Rooster, sometime the hens will lay on the eggs for a while.
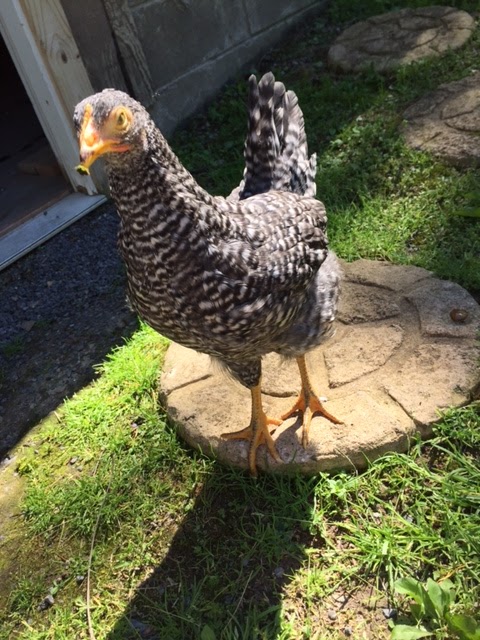
 After the girls have laid their eggs, particularly the Barred Rocks and the Buff Orpingtons they make a loud squawking noise. It is almost like they are sounding the alarms to let us know that they have laid their egg. Sometimes you can tell when they are about to lay because they will pace back and forth out of the egg box and make the same sound just a little quieter. Pacing is a common characteristic you will noticed when the hens are getting ready to lay. They will also try and seclude themselves from the group. This is how I noticed that the barred rock and the second buff orpington were about to lay their first eggs, I just had a hunch and I happened to be right! 
 The first eggs you receive from you hens could be smaller in size than what you are use to seeing. This will change over time as they become more mature. We were surprised when we saw that the White Leghorns eggs were normal in size when they started to lay.
  Also, White leghorns typically lay white eggs.  I believe they are one of the only white chickens that actually produce white eggs. All of our other hens should produce brown shelled eggs.
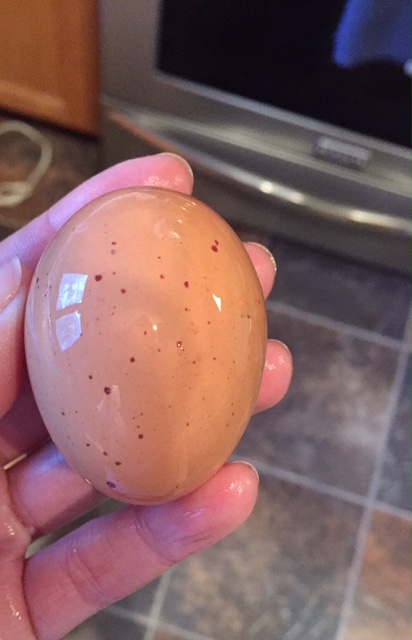
 Sometimes the eggs will have spots, be rough in texture, or have different color shells. That is all normal depending on what breed of chickens you have.
We have also noticed that the shells are thicker and harder than store bought eggs. Part of it has to do with the type of diet the chicken is on. If they have the benefit of being free-range on top of having great layer feed they have the opportunity to grab other nutrients from the ground that other chickens might not have.  Also, depending on how recent the eggs were laid (how fresh they are) can depict on how tough the shell will be to crack. If they are fresh out of the egg box the membrane inside the shell has not had time to detach from the shell inside so it will be a little harder to break the shell. Nothing too noticeable though. If the shells are hard and thick the chicken is in good health!  As the chicken ages, the shells may become thinner.. but I am hoping that is  years down the road. If you feel that your egg shells are too thin you can supplement some oyster shells into the chickens diet. They might just need a calcium boost since they use so much once they start
laying. The other benefit of having strong shells is they will not break as easily in the coop if they are not laid on a soft surface.
    I did do some research on how to properly store the eggs. Some chicken owners keep them outside of the fridge. I perfect to keep them in the fridge just to be safe. Also, we wash our eggs right before use instead of right after the hens lay. Only because there is a protective coating on them that helps preserve the egg. However, if we gave you eggs already, we washed them before we gave them too you! Which is okay to do as well. J 
 
The first round of eggs we made for breakfast!

Monday, September 14, 2015

We Need a Bigger House


So many exciting things have been happening these past few months that I forgot to show everyone the chickens second home before the coop.
  The first brooder we had for them was great. It was the perfect size for baby chicks. However, when they began to enter what I called their "teenage" phases they needed more room. They were easily hopping out of the first brooder and began to peck at each other again because the space they were in was too confined at this point. Their feathers were not fully developed just yet so we were not comfortable putting them in the main coop. Luckily, Cory had another ammo crate that was significantly larger that the first brooder. I cannot say that it is common for the chickens to have more than one home before they go out into the coop, but ours did! In home number two the girls had more room to run around during the day and had areas that they could go without being right next to each other.
  In this brooder they really started to become more comfortable roosting on the edges and flying from one point to another. The design of it was almost exactly the same as the first brooder except obviously the size of it was larger. We still used the shredded newspaper for the bedding because that was working out great for us. We did however, put in their full sized feeder so we did not have to fill the food every day with using the chick feeder because they were eating a ton now that they were getting bigger. We still have to change out their water every day because we still had not found a waterer that we like that would not leak every where but that was easy enough. I will say we tried a hamster feeder because the chickens like to peck at things and they were able to get the water out of it easily, but even that started leaking and making a mess.
  The top was covered with chicken wire which we removed when we were around to give them time to stretch and play around outside of the brooder in the garage for a bit. We kept the heat lamp on them for awhile since they still got chills at night. You could tell when their feathers were fully developed because they no longer would go under the heat lamp and we were able to turn it off. The weather was also changing at that point and the temperature was getting warmer which helped.
  Since the chickens were growing so quickly we also changed their feed. When the were chicks we got the Chick feed by Nutrena because it was smaller in size, called crumbles and it contained medication that helped support their growth since their immune systems were still gaining strength.  The feed that we switched to and use now was still made by Nutrena is called layer feed which is pellet sized. It helps chickens that will be laying eggs by providing them with the necessary nutrients they need for producing eggs and digesting their food.
  Below are a few other photos of home number two and the goofy girls who stole my heart!

Saturday, September 12, 2015

A Little Under the Weather

After work I let the chickens out of the coop to get some fresh air and to run around and stretch their wings a bit. All seemed well when I glanced over at Luna. She was not her typical self. There was no running around and she seemed to just stand still and appeared to be in a daze.
I checked the coop and noticed that she had not laid her egg for the day yet. At first I did not think too much of it because there will be days where the chickens will not lay. However, her body language looked as though she was trying to push out an egg and that caught my attention.
  I brought her upstairs and felt her abdomen to see if it was hard, it was. Luna was egg-bound. When a chicken is egg-bound they are typically trying to pass an egg that has gotten stuck in the Oviduct and are unable to lay it easily. My assumption was that Luna has been trying to push the egg out all day since she normally lays first thing in the morning.
The Egg with No Shell
  The first thing I did was create a warm bath in the kitchen sink to soak her in. The warmth of the bath would help to relax her muscles since they were probably swollen from trying to pass the egg. I put her in the water, which she was not a huge fan of at first, though she eventually relaxed. I left her in the water for about ten minutes. Then I brought her out and dried her on the towel. Next, I put some oil around her vent and just inside the vent to help lubricate the path where the egg comes out. After that I gently massaged her abdomen trying to help the muscles relax even more.
  About twenty minutes passed and she started to make a quiet whimper noise. I felt really bad that she was going through this, but I remained calm because I knew that we would figure it out. She eventually was able to push the egg out.
   Now when the egg came out it was shell-less. It was large in size and was soft which explains why it was so difficult for her to pass. This is the first time that I have seen a shell-less egg so I wanted to do some research on what causes that to happen and if there was any way I could prevent her for becoming egg-bound again.
 I found that this is common when chickens first start to lay. Their bodies are still adjusting to producing eggs so sometimes they will have one that has no shell. Some preventive measures you could take is to increase their calcium intake. I purchased some crushed oyster shells from the local tractor supply store. It is best to put these into a separate dish inside the coop because the chickens will know when they need it. You do not want to over-dose them on calcium so it is best for them to choose when they want to eat it instead of mixing a bunch of it in with their feed.
Their layer feed does contain calcium, however, when they start laying eggs sometimes chickens need an extra boost. Laying hens use three times the amount of calcium then non-laying hens use.
  After a few days, Luna was back to laying her normal eggs and running around like her old self. 

"Um excuse me, a little privacy please!" - Luna


Tuesday, September 8, 2015

Sly Fox

  Protection. One of the most stressful parts of owning chickens, but, at the same time the efforts are well worth it. When we first got the girls my worries of predators getting them was low because they were locked up in our garage. However, as soon as they were outside in the coop my anxiety level increased. There are so many creatures that would love to have an easy meal.  We have woods that back up to our home which leads to having numerous predators right in our backyard. Hawks, Coyotes, Fox, Raccoons, even possums are a few examples of predators that could harm your livestock.
      The basic form of protection starts by building a sturdy coop. You want the coop to be durable especially at night while the hens are resting because this is when most predators are on the hunt. In the design of the coop take in to consideration the points of access to the inside. Make sure the latches you use are secured enough that an animal, such as a raccoon, cannot pull down on them or lift them. You want to prevent all access to the inside while you are not around to keep an eye on them. A fence around the coop is also suggested. If you are going to keep the chickens out in a run during the day, you will want to place fencing into the ground so animals that dig still cannot access inside the run.
   The first night our girls were outside in the coop we slept with the window open so we were able to hear any sounds that were going on. We figured that animals would become curious and begin to poke around the coop so we wanted access to react if needed.
      A few nights we heard several coyotes outside of the house. The sounds they make are quiet startling. However, when we checked on the coop they were not coming toward or near it which made me feel better. Although, it is still good to keep an eye on it.
The first encounter I had with a predator was a fox we had in our backyard. The chickens were out running around the coop and I was inside the house, checking on them frequently. When one of the chickens came up on our deck so I went outside to say hello and I looked up and there was a fox, standing right behind the coop. My heart was in my throat and all I could do at the time was yell at the fox. I then grabbed our .22 rifle, sighted in on the fox and fired off a round, I missed. The fox then looked back at me and ran off. I understand that taking an animals life would be difficult, especially for me I love all animals. However, I will say when your livestock is in danger a protective instinct comes over you. If you chose to use a firearm as a means of protecting your livestock I highly suggest taking a few safety and hunting courses before hand. I have taken these courses and they were incredibly helpful giving you guidance on how to properly use a firearm and how to practice safety at all times. Especially in a situation where adrenaline is high I cannot stress safety enough. 
This is the Fox (photo taken by a trail camera)
We were very fortunate that the fox did not get any of our chickens. I was pretty rattled the rest of the day, mostly because I knew the fox would be back.
   I did see the fox one other time while the chickens were out. It ran away as soon as it realized that I was out there this time. The chickens can now only go out when Cory and I are around to watch them. We use to leave them alone for an hour or two while we ran errands, we are no longer comfortable with taking that chance. However, the girls still get to go out for several hours each day which I am please about.
    We also have had a few sightings of hawks flying overhead. None have made any attempts to harm the chickens but we still keep a close eye on them when they are around. The chickens also have a great sense of danger. When the hawks were around you could see the chickens huddling together and even hiding behind fencing or inside the coop if they felt threatened. They are also incredibly difficult to catch if they do not want to be caught. The chickens are quiet fast and can maneuver in different directions at a rapid pace. Great for avoiding predators, not so much when I am trying to get them back into the coop. Haha.  If you are going to have the chickens out while you are not around you may want to implement bird netting over your run to prevent hawks from having access to the hens.
   Cory also received some insight from our local DEC officer on what was allowed when protecting your brood. He notified us that even if the animal is not in season for hunting, if your livestock ever becomes in danger by that animal you are allowed to take necessary actions to protect the hens.
    Taking preventative measures to keep your chickens out of danger is important and it will provide you with peace of mind knowing that they are safe.